Plug and unplug PDB on the Cloud

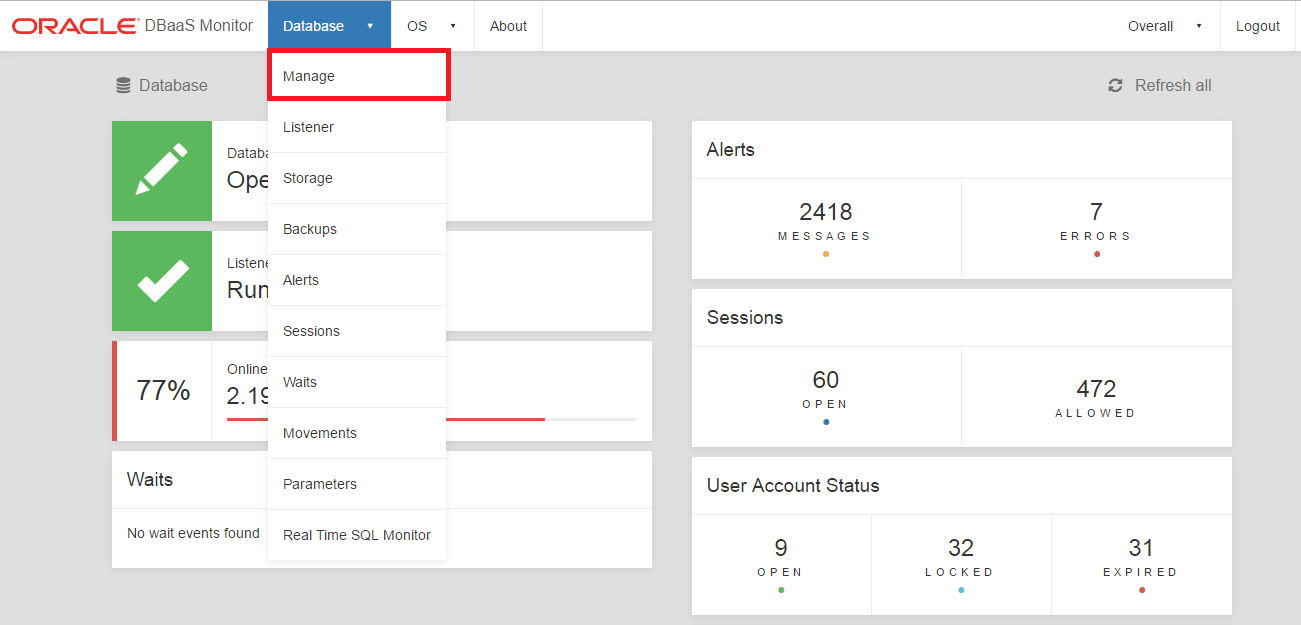
You can use DBaaS Monitor to plug/Unplug in a pluggable database.

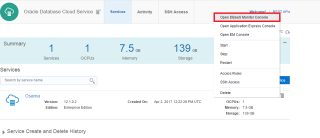
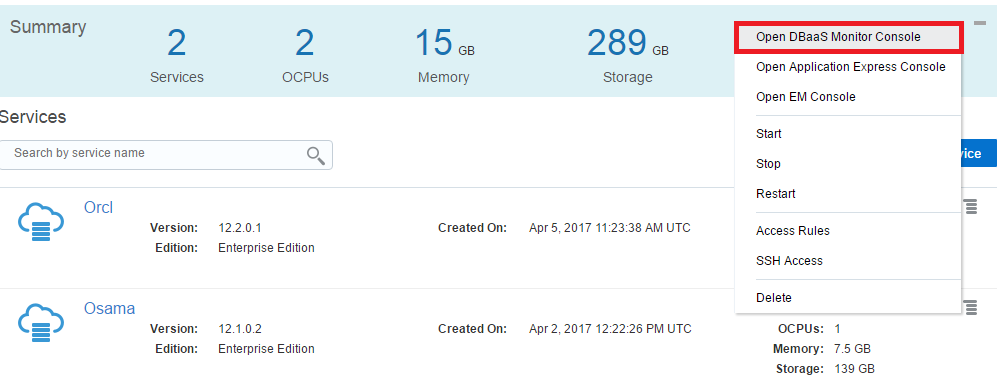
  • Open Dbaas Monitor like usual 

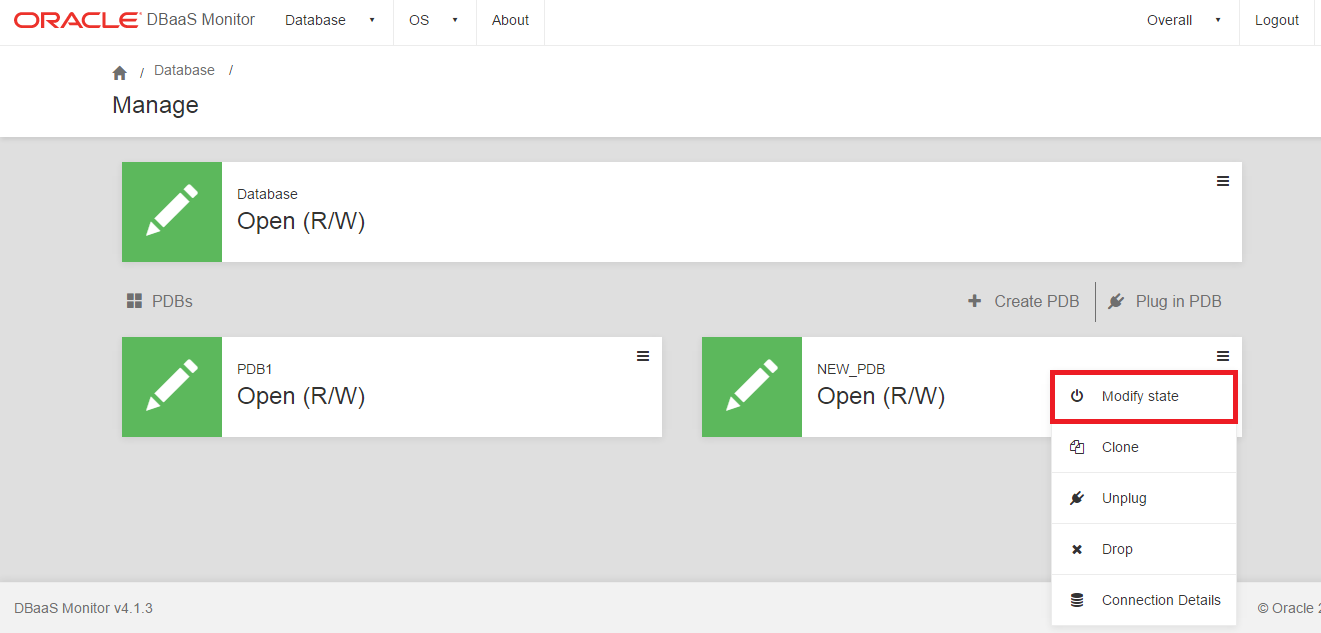
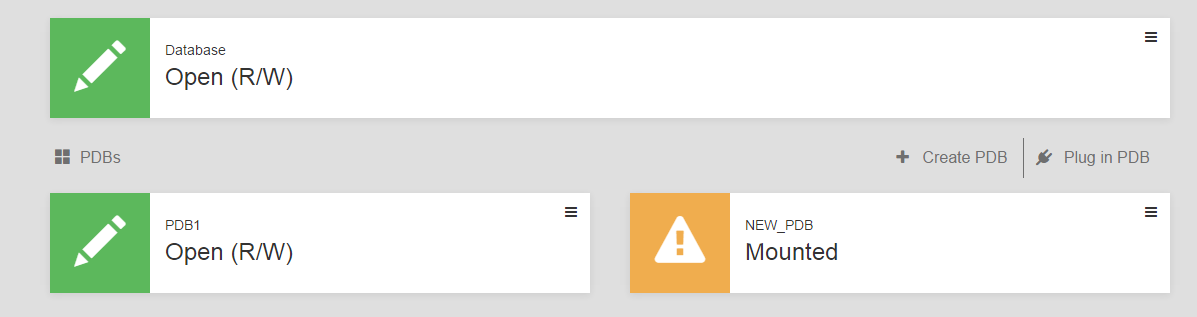
  • Once you did this the, you will redirected to new page, in my case i have 2 PDB let’s choose one of them and try to unplug it then Plug it again.
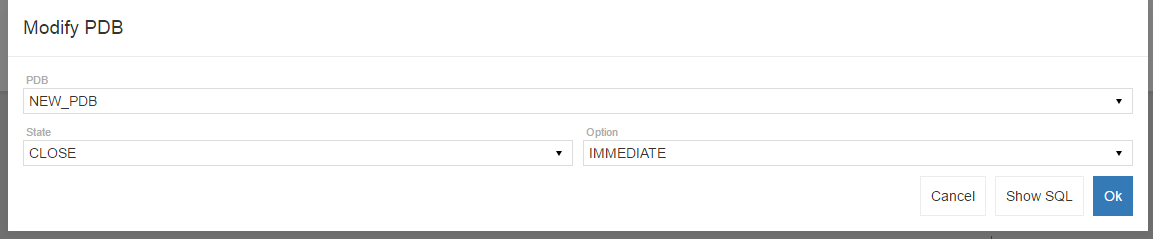
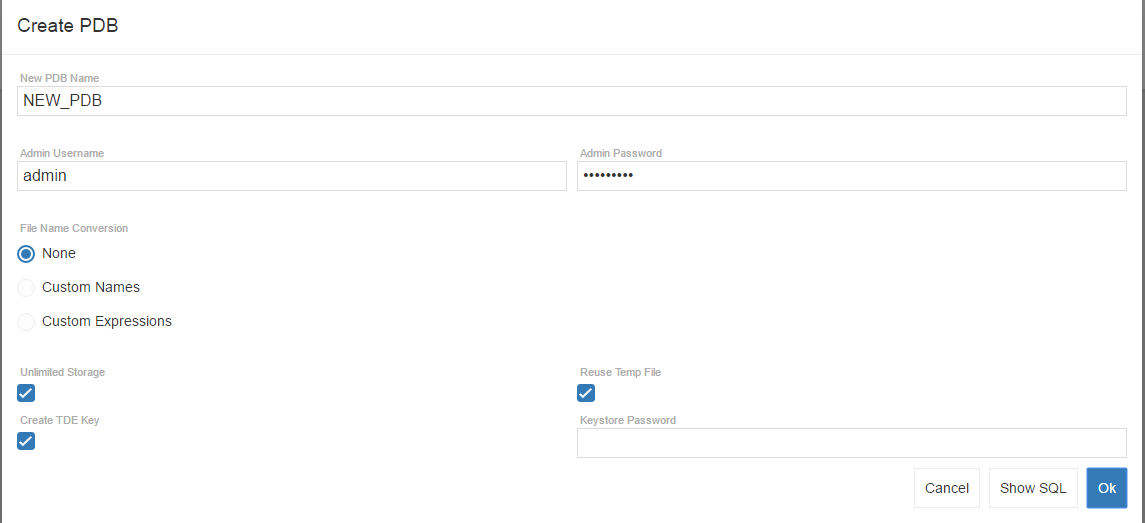
  • From the Right Panel press on the Unplug new screen will be open, As you see from the below picture you should the XML path in your mind in case you need to Plug the database again , put the password same as you use it when you create PDB.

The output should be “PDB unplugged successfully”..
Let’s Plug again.
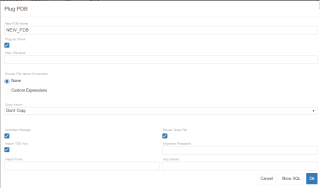
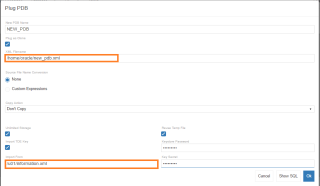
  • Press on Plug PDB on the right new screen will be opened.

Enter the following ;-
    • Name of the new PDB You want.
    • The XML file should be saved under directory you choose it
Output should be successfully done.
Cheers
Osama Mustafa

Administrating Pluggable Database on the cloud – Other Operation you can do on the cloud

In my previous post i discussed how to clone Pluggable database on the cloud using Dbaas monitor, but what else i can do on the cloud

Closing a Pluggable Database

  • Open Dbaas Monitor
  • Click on modify State, once you press on it new screen will be open contain which PDB you want to close ( if you have more than once ) and the state ( Open or Close ) with two option immediate and normal.

  • Press on Show SQL to check the command 

  • Press OK
Drop Pluggable Database 

  • Same screen you can drop the database by press on the panel then drop like the following, new screen will be opened you can choose keep the datafiles or delete them it’s refer to you
Create Pluggable Database 

  • The same screen there is option called create PDB press on it.
  • New Screen will be opened contains different parameters such as the name of the PDB, Password and file name conversion once you enter everything press ok
Cheers
Osama Mustafa

Administrating Pluggable Database on the cloud – Clone

  • You can use DBaaS Monitor to create and drop a pluggable database, open and close a pluggable database, plug in and unplug a pluggable database, and clone a pluggable database.

Let’s Start with Clone Database :-

  • On the DBaaS Monitor home page.
  • Enter the username and the password of the Dbaas Monitor , username : Dbaas_monitor.
  • From the upper tab press on database –> Manage 
  • you will be redirected to new page , this page contains what pluggable database you have , once you choose which one you want to clone, press on the panel and Press on clone
  • Once you press on clone , new page will be open contains the following 
    • New PDB Name –> New name for the clone Database.
    • Source PDB –> From where you want to clone.
    • File Name Conversion –> You are using this option in case  you want to change anything in the location of database file/ Storage.
  • Press on Show SQL 

  • Once you are done Press on Ok it will take 30 Sec to clone depend on data you have

Cheers
Enjoy the Cloud
Osama Mustafa

Access Dbaas monitor

To access Oracle DBaaS Monitor when the HTTPS port is unblocked ( i blogged about this before and how to enable it )

  • Open the Oracle Database Cloud Service console, from the console 
  • From the right panel of the services choose Database services monitor and then press on it.
  • New Screen will be opened
    • Username –> dbaas_monitor
    • Password –>  the same password you put it for the Dbaas creation.
Thank you 
Osama Mustafa

Access Apex On the Cloud Using DBaas

Oracle Database Cloud Service include Oracle Application Express, which you manage using the Oracle Application Express administration console. You access this administration console by going to the Oracle Application Express.

To access the Apex Application on the cloud;-

  • From the Dbaas you want, press on the tool panel and choose Apex.
  • To use the Apex you need to enable https on your cloud, to do this you have to access to compute services –> network and choose https
  • After doing this you will be able to access to Apex Page enter the following information:-
    • In the Workspace box, enter INTERNAL.
    • In the Username box, enter ADMIN.
    • In the password box, enter your password.
Enjoy the cloud
Cheers
Osama mustafa

Enable master key Encryption Key for a PDB on the cloud

SELECT wrl_parameter, status, wallet_type FROM v$encryption_wallet;Master Key Encryption allow you to encrypt sensitive data, such as credit card numbers, stored in table columns. Encrypted data is transparently decrypted for a database user who has access to the data. Transparent data encryption helps protect data stored on media in the event that the storage media or data file gets stolen for more information about it here.

After creating Database on the cloud ( Dbaas ) you can enable the master key by using the below steps :-

  • First of all you need to check the name of the container that you want to enable master key.
    • select con_id, dbid, name from v$pdbs;
  • as you see my container name is PDB1 set the session to this.
    • ALTER SESSION SET CONTAINER = PDB1;
  • Check the location for the wallet by running the below query :-
    • SELECT wrl_parameter, status, wallet_type FROM v$encryption_wallet;
  • Back to Root Container run the below query to see the wallet parameter type there is two value autologin or password each one of them having it’s own usage, in my case the value set to password.
  • Now i should close the wallet depend on the wallet type in my case it’s set as password then i will use the below  for more information about ADMINISTER KEY MANAGEMENT here
    • ADMINISTER KEY MANAGEMENT SET KEYSTORE close IDENTIFIED BY Mypassword;
  • When i tried to open the wallet using the same password i set it before. 
    • ADMINISTER KEY MANAGEMENT SET KEYSTORE open IDENTIFIED BY MyPassword CONTAINER=all
But my wallet is closed, i found oracle support document here Document number 1944507.1 which discuss this error and provide a solution for this error you can back to this document.
Once you apply the solution you will be able to open the wallet as below.
Welcome to TDE on the cloud.

Thank you
Osama Mustafa

Enable-Disable Database Vault on the Cloud

Oracle Database Vault restricts access to specific areas in an Oracle database from any user, including users who have administrative access. For example, you can restrict administrative access to employee salaries, customer medical records, or other sensitive information. for more information about it here

Now to enable DBV on the cloud it’s very simple all you have to do is the following :-

  • Connect to the compute node as oracle user using putty i post about this before.
  • To enable DBV Run the below command :-
    • dbaascli dv on
  • After this the output should like this “Successfully configured DV”
Congratulation DBV is enabled now.
And to Disable DBV All you have to do is Run :-
  • dbaascli dv off
Enjoy the Cloud , Cheers,
Osama Mustafa
Notes :-
  1. For the username i put C## because i am using database 12cR1 and enable pluggable..

Delete Oracle Storage cloud Container using File Transfer Manager CLI – FTMCLI

In this post i will show you how to delete the container with all the objects in it, we are using storage container to configure Oracle Cloud backup and store database backup in it, But if you want to delete this container oracle cloud will not allow you to do this because the container should be empty.

there are different way to do this all of them using command line, the way are :-

  • Web Console — working only if the container is empty.
  • RESTful API
  • Java Library
  • Oracle Storage Cloud File Transfer Manager CLI
  • File Transfer Manager API
Each one of them having it’s own advantage and disadvantage you can check oracle documentation foe this from here 
Let’s talk about FTMCLI it’s very simple and easy to use it you should have JRE 7 or later download from here
and Download FTMCLI From here
  • Now to make it simple as you can when you download put everything in one folder extract them 
  • inside FTMCTL zip file you will see files called ftmcli.properties”, this file allow you to save the storage name and configuration of Storage cloud if you do this it will not necessary to add it each time in the command line i prefer to do this, trying to do it once better to do it each time, the file having different parameters like this :-
    • auth-url :- URL of your Oracle Storage Cloud
    • user :- Your user name.
    • service :- The cloud service name.
    • identity-domain :- The name of your identity domain.
    • storage-class :- default standrad or you can change it to archive
    • max-threads :- The maximum number of threads to be used in a request.
    • retries :-  The number of times that a request must be retried in case of failure.
    • segment-size :- The segment size in MB.
    • segments-container :- The container in which the segments must be stored during the upload process.
            You can get all the information from the console –> Storage cloud –> Details.
  • Now Let’s using the command line on your PC open cmd or ssh depend on your operating system if you having Linux you need to set the export the following Check the documentation here :-
    • export FTM_AUTH_URL
    • export FTM_USER
    • export FTM_SERVICE
    • export FTM_IDOMAIN
  • using this command java.exe -jar ftmcli.jar –help you can see how to use the FTMCLI file.
  • My container on Oracle storage cloud called DBBackup so i want to delete with the below command ;-

c:\FTMCL\bin>java.exe -jar C:\FTMCL\ftmcli.jar delete -f DBBackup –properties-f
ile c:\FTMCL\ftmcli.properties

The output should be like this :-

Cheers And Enjoy the cloud.
Osama Mustafa